
This post is going to be a fully comprehensive guide on usability testing.
So much so that you should have no questions when you reach the end of this post.
Here’s a quick break down of the contents:
- What is user testing?
- Equipment needed
- How to get started Usability testing
- How much you can earn from user testing
- Answers to common questions
- My conclusion on usability testing
So without any further ado let’s get straight into it.
What Is User Testing?
For those of you who are unaware of what a user tester or interface tester is, I’ll break it down for you.
Now although it sounds technical and seems as if it requires specialized skills, it’s quite the opposite.
A user tester is essentially an average individual like me and you who represents the general population.
Usability testing companies actually prefer you to have no background or knowledge on website functionality etc.
This is because your feedback will be much more representative of any websites customer base.
Apart from websites that revolve around technology I hear you say!
When you take part in a usability test for a website you essentially document your experience through using the website.
You simply speak your mind and that’s it!
It’s that simple.
User Testing Equipment
Don’t worry too much, you simply need a headset with a microphone and screen recording software in some cases (user testing sites have their own).
This is typically all you need for usability testing.
I thought it was worth including just in case you did not have a microphone.
When I decided to start user testing I bought a cheap pair of headphones for around 20 pounds, it did the job.
You don’t need anything fancy, here are a few examples of headphones:
- Wantek Wired Headset
- Logitech 960 Wired Headset
(These are both affiliate links, so if you choose to purchase through them I thank you in advance)
In terms of screen recording software, if the user testing website doesn’t have a system inbuilt try one of these:
- OBS Studio
- ShareX
- Flashback Express
You’ll be glad to hear that all of these Softwares are 100% free.
How To Get Started Usability Testing
The site I am referring to for this setup example is UserTesting, due to having the most experience using this platform.
Now there are many other user testing sites that I have signed up to, however, most are not worth your time.
This is because I would get an email once in a blue moon to say that a test is ready for me.
Having said that, I will leave a list at the end if you are interested in applying for more usability testing sites.
Registration Process
For the sake of this example, I’ll go through the signup process with a brand new account.
Firstly, you’re going to want to head over to Usertesting.com and click ‘get paid to test’.

Simply fill out your email and wait a few moments for the confirmation message to come through.

When you log into your email you should be greeted with a message that looks similar to this.

When you click ‘complete your application’ you’ll then be taken back to the site.

You should be treated with a short video which details what it takes to be a good tester.
This is because you are going to be asked to complete a mock test to judge your skills.
As long as you apply some common sense and talk with some confidence you’ll be 100% fine.
Don’t worry too much about this as it’s predominantly common sense and can be perfected after practising a few times.
(You don’t have to be perfect first go)

Like I stated earlier, some sites have inbuilt recording Softwares, eliminating the need for a 3rd party system.
Luckily enough, the usability test site we are using has this as standard.
I’m sure you’ll be glad to hear that.
After downloading you can move on.

This second short video lists a few tips that will be of use to you before starting so be sure to listen carefully.
Move on by pressing ‘start your test’.
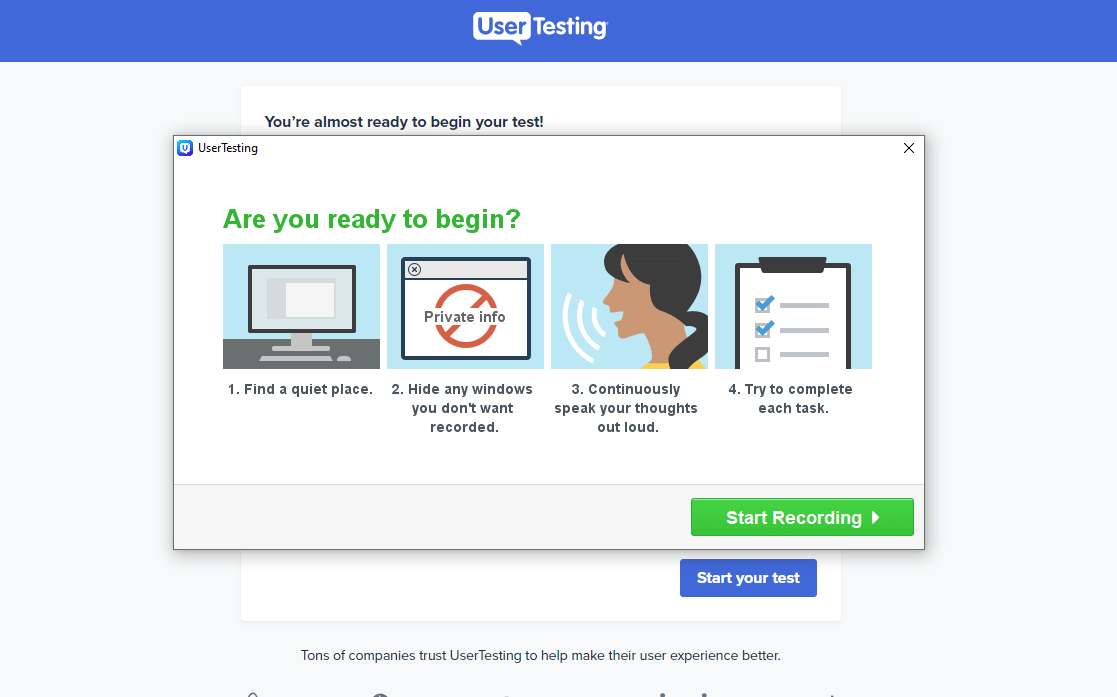
Last but not least some simple instructions/pointers before you start the test.
Once you’re satisfied you can begin the test.
After completion, you’ll be asked to wait for a review of the test.
I received mine around a week after initially doing the test so bear that in mind.
It should look something like this.
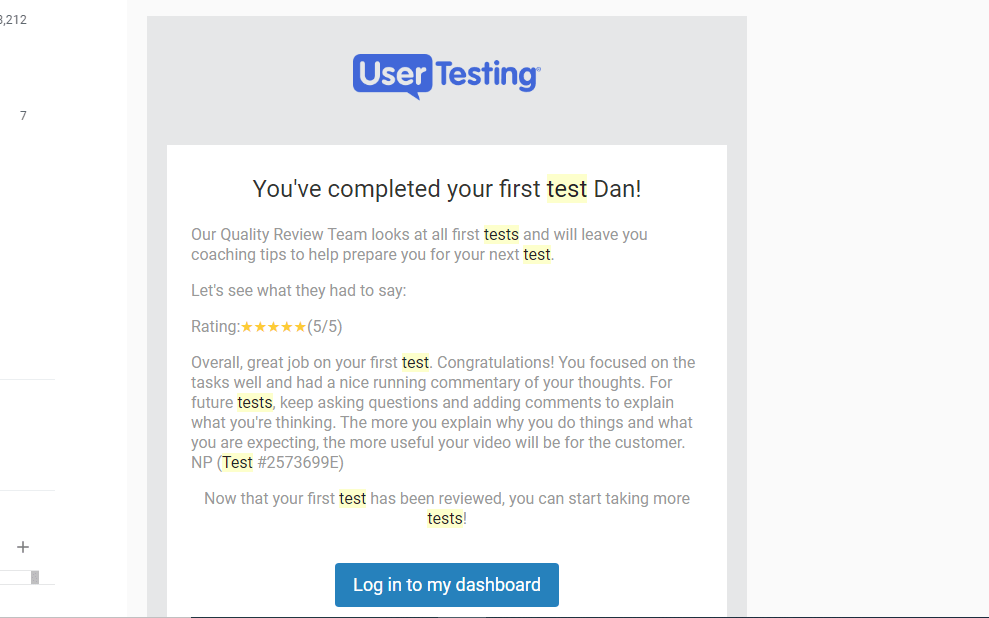
As long as you score a 3 or above, you’ll be allowed to take tests on the platform from now on.
If you score a 2 or lower it’s likely you be asked to redo this test until you reach 3 or above.
Now we are going to take a look at the typical test process once you can access the main dashboard.
Test Process
To reach the main dashboard simply head over to usertesting.com.
Click log in and fill out your details.
You should then arrive at this page, which is your dashboard in which relevant tests will appear for you.
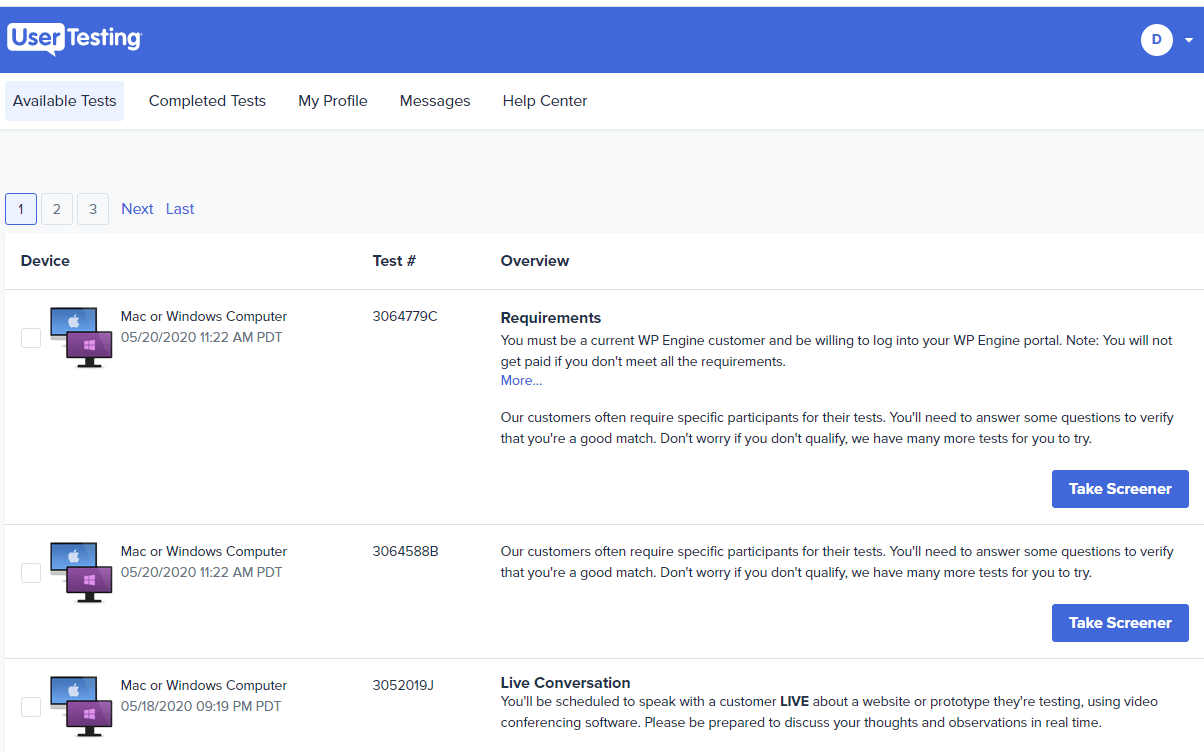
As you can see the page is easy to decipher and navigate between tests.
The difference between tests may vary depending on these few factors
- Device
- TimeFrame
- Requirements
Let’s look at each one briefly so you have a clear understanding.
Device
First up, this particular usability test site clearly displays the device(s) eligible for the test.
All you need to do is browse through the icons located on the left-hand side to identify the device.
If you are left unsure after looking at the icons, you can always see the text located next to it.
Time Frame
As you can imagine, the companies that look for usability testers all have different needs and budgets which directly impact the time you are needed.
The majority of the time there is only two-time categories:
- Standard (up to 20 minutes)- This applies to 95% of tests and is considered the standard time frame.
- ‘Live’ sessions (up to 1 hour)- Live tests will involve you talking to a member of the company discussing questions.
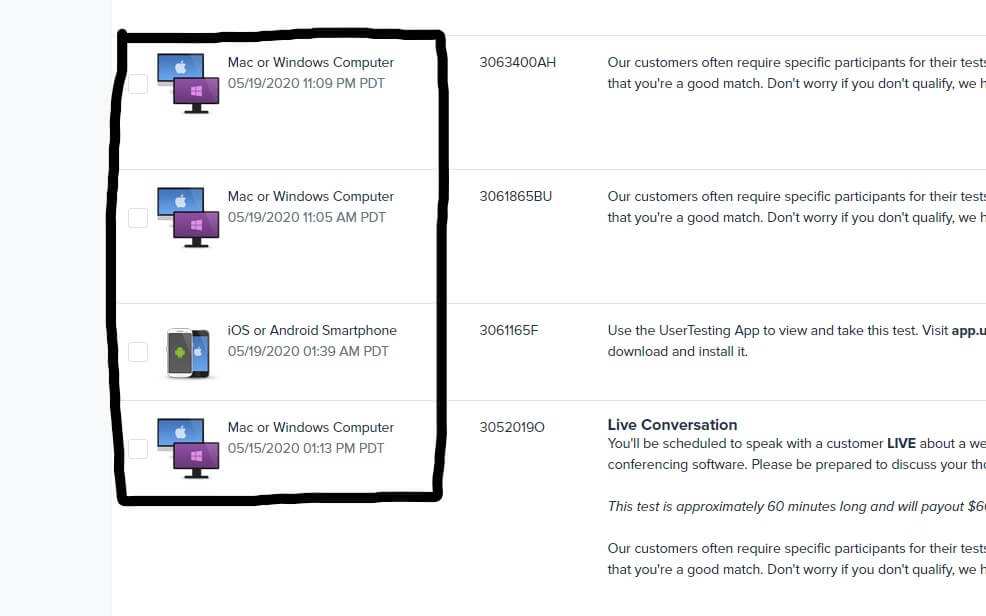
Here an example of what a live test looks like.

Here you can see it clearly states at the top it will involve a live conversation.
As well as the extension of time in the overview and how much you’ll be paid.
Requirements
In most cases, you will have to take what’s known as a screener, to make sure you are fit for the test.
This is to ensure that each company gets their ideal tester as far as possible.
Requirements can range from your job descriptions to your native languages.
Don’t worry too much if you do not qualify for the test as there will be plenty to choose from throughout the day.
Tip: Leave user testing open on your browser and you’ll receive more tests.
Completing Tests
It’s worth mentioning that much like your initial induction test, all future tests for customers will be given a rating.
This is to ensure you are exercising a good standard for their paying customers.
Again, this nothing to worry about just do your best in the tests.
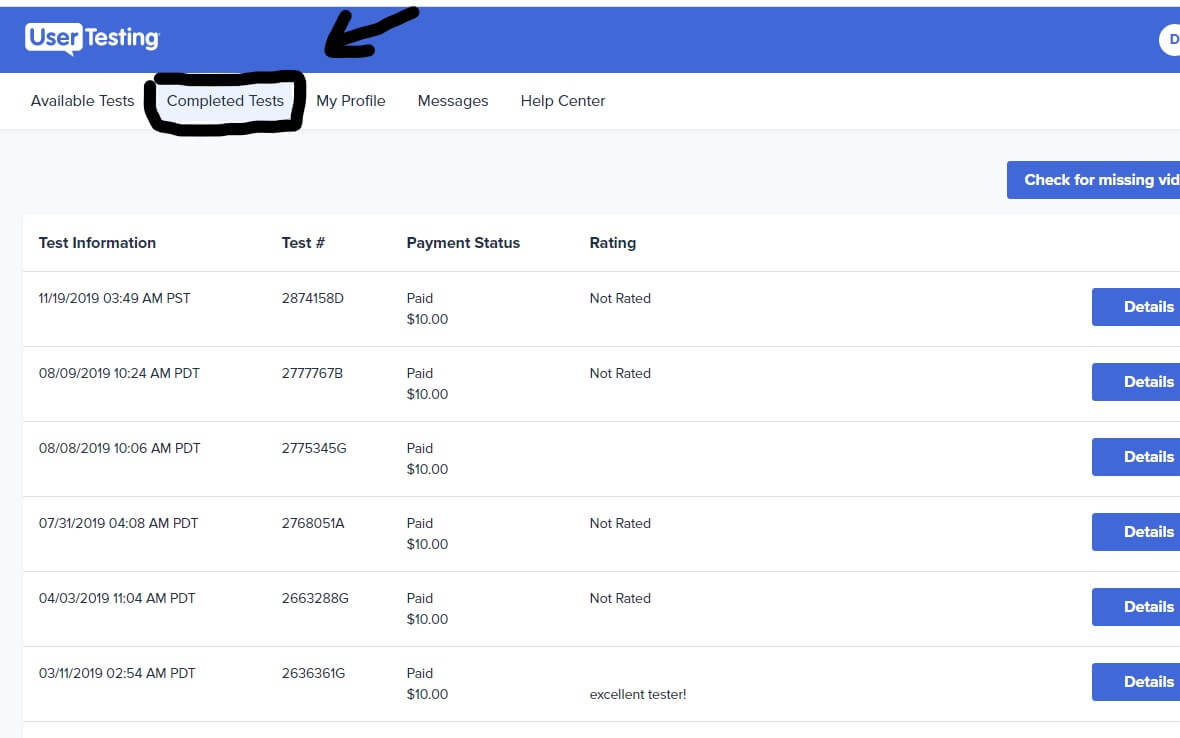
You’ll be able to review all your completed tests in on the dashboard under ‘completed tests’ as well as the rating for each.
See image below.
In terms of payments, they are normally sent to your Paypal account 1 week after the completion of your test, however, this may vary.
Whilst on the topic of payment, let’s have a look at how much you can earn.
How Much Can You Earn from Usability Testing?
Let’s talk about the money side of things now, shall we?
I would like to make it clear that in no way shape or form can you make a considerable income doing this.
This is due to the screener process and the number of tests providing in a day.
Having said that, on the whole, you are paid very well.
Each standard completed test will earn you $10 dollars (£7.70) which will be deposited into your PayPal account at a set date.
You may also come across the other type of test (mentioned above) which can fall into 2-time durations.
These tests I’m referring to are live talks with the customer.
This evidently is more valuable to the customer, which in turn warrants a higher price.
30 minutes live chat will give you $30 dollars (£22) and a 60-minute chat will give you $60 dollars (£45).
This money can be transferred between currencies through PayPal of course.
On average, it works out at around $60 an hour depending on your completion time.
I’m sure we can agree even half of that an hour is a good hourly rate.
Answers To Commonly Asked Questions
Now we are going to take a look through some commonly asked questions regarding usability testing.
Are there any other usability testing sites?
Answer:
In short, yes, but it should be noted that they are lesser-known meaning fewer tests and perhaps a lapse in service.
Here is just a few that I have checked out:
What is the purpose of instability testing?
Answer:
To improve the functionality, layout and navigation of websites by taking into account what the average consumer thinks about the site.
Can you do mobile usability tests?
Answer:
Of course, just like tests on desktops, usability tests are quite common for mobile.
This may be more so in future as we are seeing a gradual transition from desktop to mobile devices.
Conclusion On Usability Testing
We are now drawing this post to a close.
I hope that I have answered any questions you may have had on usability testing.
As you can see from the information provide, user testing can serve as a good supplementary income stream.
Besides the good hourly rate, you have the opportunity to voice your opinion on websites and their functionality.
It should also be noted, you require no qualifications nor much equipment to start earning.
If you haven’t already, I recommend signing up with Usertesting and giving it a try for yourself!
If you enjoyed this post, consider checking out how to make money online at home such as:
If you have any questions that need answering, do not hesitate to leave them in the comments.
Lastly, check us out on our socials for more unique content and updates.